Sunday, 16 September 2018
Putting everything Together PNR2.5 + PN Brushless ESC - Sweetness
Well I have covered most the individual parts in the past post and now its time to put everything together and you will definitely understand why all the cutting, soldering and modding is needed.
1. You will first need to solder the bridge cable for the negative and the positive terminal. I prefer to do it this way as it is neater.
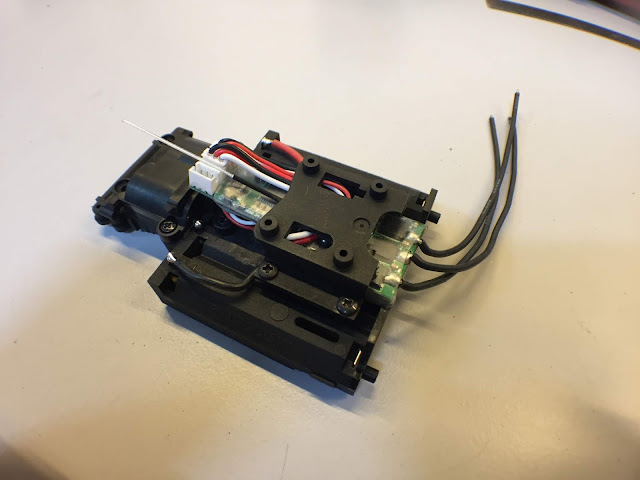
2. Next sit in the servo assembly this manner, without the switch I can hide the servo board in the switch area of the chassis.
3. Put a bit of hot glue to hold the servo board in place so that it will not move around causing tension to the wires.
4. Fit on the servo motor cover.
5. Heat shrink the PN ESC, flip it around and put a huge piece of double sided tap on the back.
6. Stick it onto the chassis. Here you can see that the CAPacitor actually sits nicely in the space where we shaved off the servo motor cover.
7. Heat shrink your receiver, flip it around and also put a huge piece of double sided tape on the reverse side.
8. Put on the front cover of the chassis and then place the receiver in this manner.
Take note of how the wires are being routed.
9. Fit on the top cover, you will realise that there is enough space for the cables as you previously shaved off part of the top deck.
Shorten the positive and negative power cable from the ESC and solder them on the chassis and you are all GOOD to go.
Happy modding GUYS :)
MODDING THE PNR ESC (Secrets Unveiled)
The chassis is ready, the servo assembly is ready and now let's get to the ESC.
There are so many ways to prep the ESC for the chassis and of cos you could just plug and play, do nothing and fit the ESC into the chassis but this is my personal preference, it looks tidy and good plus it is definitely fail save for race. You will see why ............
On the back of the ESC you will see a lot of cables, well end up I will de solder all the cables re solder them back a different way.
Lets start with the ON/OFF switch. For years all my race cars are DE SWITCHED. The reason is simple, I want to minimise any chances of failure and the ON/OFF switch might fail. Also do you really need a ON/OFF switch :p your choice.
Desolder the ON/OFF switch and just use a bit of Solder lead to short both the ON & OFF together.
Next, flip the board around and place bit solder across the last to legs on the BIG component below the button. Basically by doing so you are by-passing the BEC and allow all the power to go the board without restriction. *DO THIS ONLY IF YOU ARE RUNNING NIMH BATTERIES*
Next, remove all the cables on the reverse side. There are a couple things I am doing here so pay abit of attention.
- First, I am taking the opportunity to shorten the signal cable
- Secondly I am modding the CAPacitor so that I can get rid of long unwanted cable.
For the capacitor mod, use a tweezer and lightly pull off the heat string, you will expose the cables and you will then be able to de solder cables.
There you go- de soldered
After that you, solder the capacitor back on to the board with the cables : )
There you go.... all done. Hope its not too difficult.
:)
Servo Assembly For PNR 2.5
In the earlier post, I shared about how to prep the PNR chassis for the PN Brushless Board. Well in this tutorial let get down to the electronics and in this post we will talk about the servo assembly.
1. Servo Electronic Assembly
There are a couple of stuff you will need for the servo assembly and here are SKUs.
- 500804 PN Racing Micro Servo Board
- 500136 PN Racing Servo VR
- MZ408-2 Kyosho Servo Motor
- MZ408-1 Kyosho Servo Motor Pinion
I would recommend to start soldering the cables to to the servo board first
Follow by soldering on the servo motor as it is on the side of the board.
Next you will need to solder the cables on the VR.
Lastly the VR on to the SERVO board.
Alright, seems like the soldering is all done now lets get to the servo assembly portion.
You will again need some parts for it and the SKUs as follows:
- MZ402 Kyosho Chassis Small Part Set
- MZ405 Kyohso Servo Saver
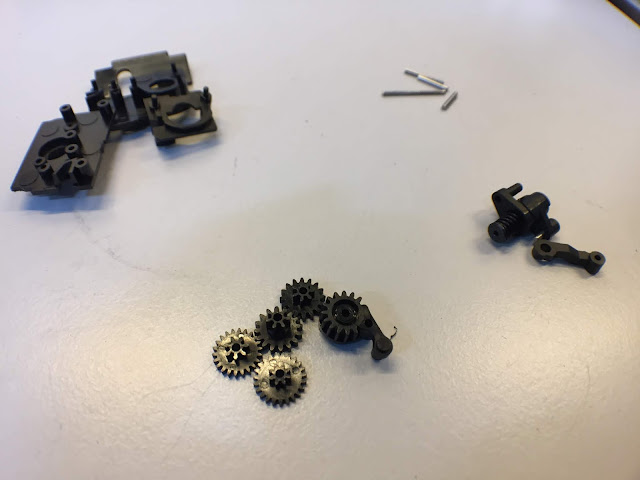
- MZ404 Kyosho Servo Gear Set
When you put the parts together the assembled servo assembly will look like that.
There you go the servo electronics parts and the servo assembly is all done :)
While you are at this stage you are building the servo you might want to consider to soup it up alittle by changing some of these goodies from PN Racing.
MR3090 - PN Racing Delrin Servo Gears
MR3056B - PN racing Brass 4th Servo Gear
Links as follows:
http://www.kenonhobby.com/PN-Racing-Mini-Z-MR03PNW25W-Delrin-Servo-Gear-Set_p_46044.html
http://www.kenonhobby.com/PN-Racing-Mini-Z-MR03-Brass-4th-Servo-Gear_p_45963.html
Prep your PNR2.5 Chassis For The PN Brushless ESC
I have been asked multiple times how to actually prep the PNR chassis to fit the PN Brushless ESC.
So heck, let's write about it.
It is quite a lot of work but trust me it's all worth it. Moreover if it's really easy and simple then there will be alot " WORLD CHAMPS" lol.
Let's start with shaving off some parts to make space for it. I have marked out all the parts that you need to shave off in silver.
1. On the main chassis these are the areas you need to shave off.
AFTER
2. Next you will need to shave off some access parts on FRONT top cover and the top top deck.
BEFORE
AFTER
3. Lastly cut off a portion from the servo motor holder
BEFORE
AFTER
Well that's all for cutting. Stay tuned next for the electronic mods:)
Happy cutting guys
Tuesday, 14 October 2014
HAVE YOU SPEKTRUM-ED ?
The spectrum board for the Mini-Z has been out for a couple of months for now and we are starting to see it gain popularity. I have been asked so many times. Is spektrum better than the ASF?
Is it faster? Is it more responsive?
In my honest opinion, I wouldn't say which is better but I can share the advantages.
1. Braking - the spectrum works on a different channel for brakes and reverse where else the ASF doesn't. You are able to set a much milder braking force and not sacrifice your reverse speed.
2. Power - oh yes, the spektrum board is indeed punchy because the original board comes factory fitted with double layers of the PN FETS. And these fets have one of the lowest resistances and yet able to handle 8 AMPS of power draw. The stock fets on the ASF doesn't give you that much of power. But of cos you can swap out the stock fets on the ASF boards with some PN FETS to give you more power
3. Ports - the additional ports on the board powers the transponders leaving the I.C.S port free. No more plugging and unplugging your transponder just to do I.C.S programming.
4. Software - the PN software for ICS programming is a lot simpler than the Kyosho ones. And I bet you. You will definitely be playing with the software a lot more. The ASF version is so complicated and it seems like I need to carry a bible just to do some settings. And that is one of the main reason ASF I.C.S software is never popular. At times software settings on the car is a lot faster than hardware settings during races.
5. On Board Processor - the spectrum board has 2 ICs on board for data processing. One for the steering and the other for speed. Where else ASF uses 1 IC to do both the processing. I feel individual processing is definitely better than shared processing.
Lastly I feel that the Prefect Combo = Spektrum + PN ICS Blue tooth adaptor + Android phone. Thats all you need for most of the races. Simple, Lightweight and the phone is always in the pocket.
Plenty of setting options.
You decide :)
Wednesday, 8 October 2014
Sunday, 5 October 2014
RACE SHELLS
I have covered parts for the car, different stages you can consider. I have also covered setting tips and also tire choices.
Well I would like to share some information on "race shells". You must be wondering. Kyosho makes fantastic nice shells. Why are these guys running on shells that looks UGLY.
We run shells that look ugly and call them "race shells" because
1. You can choose your own colour scheme and I bet you this is important in a race because that sets you apart from the rest of the racers. People see and they recognise your shell not you.You won't want to run a shell that's off shelf because there might many others running the same shell as you.
2. "Race Shells" are typically a lot lighter than the stock ones as we do not apply a heavy coat of paint on it for one. We change out the windows to a lexan window so that it's a lot lighter. We also make openings on the shell for better down force.
3. Shell height can also be custom as you glue on the side clips. Most of our race cars are typically set up to be really low and therefore the stock shells tends to scrap the track.
There are also a couple of shells that is highly recommended for race due to the design, the handing or the rigidity.
I would highly recommended using either the Audi R8, Ferrari 458 or the Ferrari 599. I personally tested all those shells and I find them highly competitive.
In the next article I will be showing you step by step on how to prepare a race shell.
Subscribe to:
Posts (Atom)


